Pool Liner Installation: Professional DIY Guide & Best Practices
Applying a new pool liner often presents itself as a mammoth task, but if one goes by the proper instructions, it becomes nothing less than an easy task—even for the people who opt to do it themselves. It doesn’t matter whether you are aiming to change the style of your pool, fix an area or two that is not perfect, or just cut down on costs of professional installation; this guide contains all-in-one, step-by-step directions to get it done correctly. We won’t miss anything from the basic preparation tips to the good practices that give rise to long-lasting and precise results. When you have the proper equipment and you are patient enough, it won’t take long for your pool to get the expert-like look of a professional job.
Understanding Pool Liners
Types of Pool Liners
There are three main kinds of pool liners that are usually employed for both above-ground and in-ground pools: overlap liners, beaded liners, and unibead liners. Every kind has characteristics which are different and fit different pool types and people’s preferences.
Overlap Liners
Overlap liners are the cheapest pool liner option and at the same time are made to accommodate a large range of pool shapes and sizes. These liners are fixed by simply overlapping the pool wall and then using coping strips to hold them in place. While these liners are easy to install, their appearance may not be as seamless as the appearance of other types since excess material often hangs over the edge.
Beaded Liners
Beaded liners attach to a bead receiver or track at the top of the pool wall like a necklace to a chain. They provide a neat and professional look since there is no need for overlapping material. Beaded liners are available in numerous patterns and designs so they become a popular choice among people looking for aesthetic enhancements.
Unibead Liners
Unibead liners draw on both overlap and beaded liner features which makes them giving flexibility in installation. It can be hung as a beaded liner or an overlap liner, depending upon the pool structure. Such a dual characteristic renders unibead liners an adaptable and a convenient selection for all pool owners.
Key Insight: Getting familiar with the liner types will make it easier for you to pick the right liner for your pool, thus balancing cost, aesthetic and installation ease.
Benefits of Vinyl Pool Liners
💰 Affordability
In general, vinyl liners are the most economical option for pool surfaces compared to concrete or fiberglass. Their cheap initial price is an attractive factor for pool owners who are short on money but do not want to compromise on quality.
🎨 Customizable Designs
There are literally thousands of different colors and patterns with various thicknesses for vinyl pool liners, which means you can already design your pool’s appearance the way you want it. Whether you prefer traditional tile designs or funky contemporary patterns, there is always a style to complement every taste.
✨ Smooth Surface
Vinyl liners provide a very smooth and non-porous surface which is comfortable for swimmers and also reduces the chances of accidents occurring. Another advantage of this smooth surface is that it is quite easy to clean and upkeep as parasites like dirt and algae will have fewer areas where they can thrive.
🔧 Low Maintenance
Vinyl liners, when compared to other pool finishes, require less upkeep throughout their lifetime. They have a non-porous surface that deters the growth of algae and if you happen to need repairs for your vinyl liners, they are usually fast and inexpensive.
⚡ Ease of Installation and Replacement
Vinyl liners are a bit easier to install and replace in relation to other materials. The installation time is shorter and when a liner is no longer usable, which usually happens after 7 to 15 years, it can be disconnected and replaced without causing too much inconvenience.
Choosing Between Overlap and Inground Pool Liners
Overlap liners are budget-friendly and easy to install, while inground liners offer a cleaner finish and are more durable.
Preparing for Pool Liner Installation

Assessing Your Pool’s Condition
The state of your swimming pool has to be thoroughly evaluated before a new liner is installed since it is the primary requirement for a smooth and consequently, a successful installation. To start with, the pool base should be checked for cracks, dents, or unevenness as these may affect the liner’s fitting and consequently, wear out or leak earlier than expected. If any issues regarding the structure are found out, they should be fixed first to form a strong and smooth base for the new liner. It is advisable to go for a professional opinion if significant damage needs to be repaired or if there are underlying structural issues that have to be solved.
⚠️ Critical Inspection Points
- Pool walls, skimmers, and returns should be looked into and inspected for damages or corrosion
- Find any edges or parts that could be sharp or might stick out and thus could puncture or tear the liner in the long run
- Rusting or scaling on the pool walls has to be treated thoroughly so that it does not come back and cause more damage later on
- Built-in steps, lights, or other custom features have to be examined very carefully to ensure that they are accepting of the new liner
Cleaning the pool surface is a must-do-before-liner-installation task that has to be done a very thorough job on. Clearing the way for liner’s adhesion by getting rid of the debris, organic material, and dirt is very important. A good cleaning lowers considerably the likelihood of the liner having imperfections under it and guarantees a tight, smooth fit. By evaluating the condition of your pool and solving the possible problems before they manifest, you will be decreasing the number of repairs and the cost that goes with it. It cannot be overstated that planning and preparation will go a long way to achieving a result that is aesthetically pleasing and at the same time, durable.
Measuring for a New Liner
Perfect measurements are the main point in making sure that your pool liner has the right fit. Initially, the shape of the pool must be recognized with great care, and the most common ones are the rectangular, oval, and freeform designs. The pool’s length, width, and depth should be measured at different places so that the irregularities will be covered. For pools with rectangular shapes, the total length and width should be measured at the top and bottom, thereby making certain that the measures are the same. Flexible measuring tapes can also be used by the oval or freeform pools to follow the curves and get accurate dimensions recorded.
📏 Essential Measurement Guidelines
- Depth Measurements: At the deepest point of the pool floor and at the shallow end measure the distance to the top of the wall
- Sloped Bottoms: For pools with sloped bottoms, the transitions and the length of slopes should be indicated for an exact fit
- Wall Height: Provide specifics concerning the pool’s wall height and whether it has any peculiar features like steps, ledges, or built-in benches
- Documentation: A pool-specific measuring form can be used in order to avoid misunderstandings and also to ensure that you do not miss any critical dimensions
If you couple imperfect measurements with detailed records, you will be able to get a liner that perfectly fits your pool, or even have it custom-made. If you take the time at the beginning, you will not have to suffer the costly mistakes and the smooth installation process will be provided, which means saving time and effort in the long run.
Gathering Necessary Tools and Materials
For a smooth swimming pool liner measurement and installation process, it is of utmost importance to first gather all the needed tools and materials. Ready to go everything ahead of time permits fast work and lessens the likelihood of being interrupted.
🔧 Basic Tools
- Long measuring tape (preferably for outdoor use)
- Carpenter’s level
- Plumb for perfect vertical measurements
- Notepad or pool-specific measurement form
- Pencil and waterproof marker
📱 Modern Technology
- Camera or smartphone for documentation
- Digital measuring apps
- 3D pool design software
- Measuring verification tools
🛠️ Installation Materials
- Liner adhesive
- Swimming pool vacuum
- Utility knife
- Disposal gloves and cleaning supplies
- Patch kits for minor repairs
You can reach outstanding precision and the perfect fit for your pool liner by mixing conventional measuring practices with modern technology, thus making the project as stress-free as possible.
Step-by-Step Pool Liner Installation

Draining the Pool
Draining your pool is the very first thing to do and moreover, it is among the key aspects when it comes to replacing the swimming pool liner. To protect the equipment, you should start by shutting down the main power supply to all the pool accessories such as the pump and the filter. The water will then be sucked efficiently by the submersible pump, so connecting it to the hose that is long enough to take the water away from your property safely is also very important.
⚠️ Important Safety Considerations
- Verify whether the spot where the water is being drained to meets the requirements for local water disposal, so that you will not get fined or face environmental issues
- The operation of the pump should be checked constantly during the whole draining process because it can last long hours depending on the pool’s size
- Inspect the area around the pool for any possible water drainage problems
- Look for poorly drained land, underground utilities, or drainage routes that could result in water accumulation
When the water level gets pretty low, manual methods like buckets and a wet vacuum can be employed to remove any remaining water, especially in the deeper areas of the pool. When the pool is drained, you can examine the spot to see if patches, cracks, etc. have been formed already, as these are the most common cases of damage that need to be repaired prior to new liner installation. The dirt, algae and debris that can potentially affect the new liner’s adhesion or fit should already be wiped off the pool. A clean, dry pool is a must for the new liner to lie down flat without any folds or air pockets.
Installing the New Liner
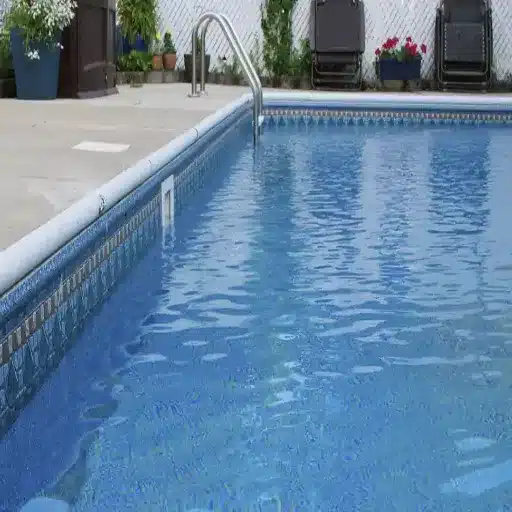
The installation of a new pool liner demands accuracy and meticulousness in carrying out the various steps in the process. First, take the liner out of the packaging and place it on the pool surface with precision. In case your liner is marked, you should correspond them precisely to the liner’s position. Then, fixing the liner’s top edge to the pool coping or track usually by means of a bead or clip system is a typical practice. By the time you are done, your pool should be evenly tensioned all around. Misalignments that can cause sagging or wrinkling once the pool is filled with water should be avoided and hence taking time in this stage is very necessary as it is very easy to make mistakes.
💡 Professional Installation Tips
- Vacuum Process: After the top edge is secured, use a shop vacuum to eliminate the air that is between the liner and the pool walls. The liner will then stay in that position and the chance of having bubbles or creases will be lessened
- Edge Sealing: The reason why the vacuum hose should be behind the liner is to make the edges have a tight seal, and thus, the air has no way of coming through
- Wrinkle Removal: During the time the vacuum operates, keep an eye on the liner to spot any wrinkles or flaws and use your fingers to smooth them out
- Final Check: When the liner has molded itself to the walls and floor perfectly the next step can be taken
In the end, gradually start filling the pool with water, while at the same time checking the liner for any shifting or movement. Filling just a few inches at a time is the best option since it allows for making minor adjustments if necessary. After the water level has reached about one foot, proceed to install the last fittings, trims, or gaskets, such as skimmer or main drain, which give a watertight seal, along with the proper installation of the water valve and the like. This slow and careful method guarantees perfect placement of the liner and gives the pool a polished and professional appearance.
Filling the Pool and Adjusting the Liner
Once the liner of the pool installation is completely done, the filling of the pool with water will be done very slowly so that the structure and shape of the liner are built up gradually. The water pressure will force the liner to stick to the pool walls and bottom, making it a perfect fit. Throughout this process, the liner should be checked continuously, and no folds or wrinkles should be allowed to develop. If wrinkles do come, they could be smoothed out by gently pushing the material towards the pool walls with your hands or using a pool brush. It is very important to get rid of any creases very early on because they may turn out to be permanent and will thus ruin the look and functionality of your pool.
🎯 Key Focus Areas
- Be especially careful with the areas around steps, ledges, and corners, as these are the places where slight misalignments usually occur
- The water should be allowed to flow in slowly and at a controlled rate to avoid putting too much pressure which could result in a sudden shift of the liner
- Use professional tools such as a liner vacuum to prevent the occurrence of air pockets under the liner during the filling of the pool
- The process will make sure the liner is exactly the same all over the pool, thus making the whole pool not only more beautiful but also stronger
Moreover, before the filling is regarded as complete, all seams, fittings, and gaskets should be checked once more for leaks or gaps in order to keep the watertight seal intact. It is recommended to use a pool sealant or gasket lubricant to strengthen the areas with the above-mentioned problems for the best result. After the pool is filled to capacity, the liner should go through a thorough inspection for the last time. The evenly spread liner, absence of wrinkles, and strong seals will ensure not only a good-looking surface but also a pool that lasts and is trouble-free for a long time. By combining very close attention to detail and very patient implementation, you will get professional results that not only increase the fun factor of your pool but also its lifetime.
Replacing Your Pool Liner

Signs It’s Time to Replace Your Pool Liner
A pool liner is a basic part that keeps the pool safe and good-looking. However, after a while, the liner may lose its functionality owing to the daily applications, the weather, and so on.
🔴 Cracks or Tears
The most prominent sign of an overdue pool liner replacement is the appearance of the liner, which is in cracks or tears. Such flaws do not only ruin the pool’s beauty but can also contribute to inefficient swimming pools and increased water costs by causing leaks. Patching up small rips is often possible; however, if the liner has widespread cracking, it is generally considered to be non-useable.
🟠 Fading or Discoloration
It is the sun and pool chemicals that are the major culprits in breaking down the liner’s material and making it lose its lively color and become hard. The breakdown of the material makes it easier for the liner to crack. In addition, the reflection of faded liners might be a sign of poor maintenance, which can decrease the overall value of the pool area.
🟣 Wrinkling or Slipping
Wrinkling, slipping, or inability to keep the liner in place can signal a problem. Liners may lose their original fit that comes avec stretching over time, especially if they were initially poorly installed or kept under bad temperature conditions. Although such wrinkles might be quite unpleasant to look at, they can also pose a risk of someone tripping.
Important Note: A loose or slipping liner would mean that water is seeping into the underground and causing damage to the pool walls. This can also happen if the water behind the liner has not been replaced in time because the pool’s structural integrity has been compromised. Early detection of such issues through replacement of the liner can save on expensive repairs and provide a safer and more pleasant swimming environment. While being vigilant to these common signs, pool owners will be able to make smart choices that will not only preserve their investment but also keep the swimming area looking great.
Steps for Removing an Old Liner
1️⃣ Drain the Pool
The very first thing that you need to do is to completely drain the pool off all its water and for that, you will require a submersible pump to do the draining. After that, it should be so that there is not even a single drop of water in the pool area which is very important from the safety and also the convenience of removal point of view.
2️⃣ Detach the Liner from the Track
With the help of a utility knife or any other cutting tools that are suitable for the purpose, you can now proceed to detach the liner from the track at the pool’s top edge very carefully. If you intend to reuse the track for the new liner, then please handle with care not to damage it.
3️⃣ Cut the Liner into Sections
In order to handle it and remove it easily, the liner must be cut into small strips or sections. This is really advantageous for big-sized pools as it will not only make the old liner removal process quick but also safe.
4️⃣ Inspect & Clean the Pool Shell
The moment the liner has been entirely taken out, the pool shell must be checked for any kinds of defects, dirt, or water. Make sure to clean and fix any problems like minor cracks or mold which would hinder the new liner’s installation.
5️⃣ Dispose of the Old Liner Properly
The old liner has to be disposed of in accordance with the local waste management rules and regulations. Vinyl liners are accepted by many recycling centers, so check for eco-friendly disposal options around your area.
These steps, when followed carefully, will help pool owners to have their old liners removed efficiently and thus, the way for a smoother new installation will be opened up.
Installation Tips for New Liners
✅ Best Practices Checklist
Pick the Perfect Liner for Your Pool: Choose a liner that is identical to the swimming pool in sizes and contour. Also, check if the material is strong enough and compatible with the pool’s structure. Thicker liners are usually more durable but think of your limitation and specific requirements when making a decision.
Commence with a Level Surface: Prior to purchasing the new liner, inspect the swimming pool area for any debris, cracks, or sharp edges. Instead of arranging a rough surface to tear the liner or make it worn out, utilize a pool pad or foam underlay to give extra protection and a smoother finish.
Align and Fix the Liner the Right Way: To start with, place the liner over the pool area equally. Keep it in position with weights or clips. Slowly smooth out any folds or air pockets to make a tight and skilled fit. The right position not only guarantees long lasting but also improves the look of the pool.
Slow and Steady Filling with Water: When water enters the pool, keep a close eye on the liner for any movement or bumps. If the liner is not where it should be, move it around to the right place so that it can settle evenly during the filling. This will help to eliminate the need for future maintenance resulting from improper fit.
Make Sure There Is No Leakage: When the pool is filled with water inspect all around the edges and seams for tightness. If there are any areas, apply sealants or adhesives to stop any leakage. Doing proper sealing not only prolongs the liner’s life but also makes the pool water retain its efficiency.
Inspection as Part of Regular Maintenance after the Installation: After the installation, regularly check the liner for wear and tear like small cuts or change in color. Quick detection of the problems can save you from bigger ones and also provides the protection of your capital.
If the installers follow these expert advice and blend them with information from trustworthy sources, pool owners can have a hassle-free liner installation that will be both functional and aesthetically pleasing for a long time.
Maintenance of Your Pool Liner

Cleaning Your Vinyl Pool Liner
The upkeep of your vinyl pool liner properly starts with cleaning it regularly so that all dirt, algae, and debris do not accumulate. Begin by lightly brushing the liner with a soft-bristle pool brush to remove the loose particles, while being careful not to scratch the surface. A pool vacuum should be used to clean the bottom of the pool, concentrating on the corners and areas where the most debris is likely to accumulate.
🧼 Cleaning Guidelines
- A solution of mild detergent and water can be used for very difficult stains. The detergent can be applied through a soft sponge or a cloth
- Do not use strong chemicals or abrasive scrubbing tools because they can destroy the liner’s surface and, in turn, its life span
- Balanced water chemistry is vital to ensuring that the liner does not get discolored or scaled over
- Check regularly and manipulate pH, alkalinity, and chlorine content to keep the water clean and clear
If you use strategies like these and also the latest best practices and insights you find online, for example, seasonal cleaning recommendations or eco-friendly cleaning products, you’ll not only protect the vinyl pool liner’s integrity but also enjoy a clean pool throughout the season.
Common Repairs for Pool Liners
With time, pool liners will gradually get damaged and thus necessitate some repairs along the way so that they can continue to serve their purpose and look nice.
🔧 Small Rips or Holes
One issue that keeps coming up time and again is the occurrence of small rips or holes in the liner which can be caused by sharp objects, improper maintenance of the liner, or the liner material gradually aging. Such damages can be fixed most of the time with the help of vinyl patch kits, which contain adhesive patches meant specifically for underwater secure bonding.
📏 Wrinkles in the Liner
Another issue that happens quite often is the emergence of wrinkles in the liner, which may come about due to improper installation or movements in the ground under the pool. These wrinkles can usually be removed by applying slight force to the area and letting the liner recover its original position and shape. It is very important to take care of the wrinkles immediately because if they are not, the liner might get weak due to continuous pressure in one place over time.
💧 Seam or Fitting Leaks
Another difficulty that pool owners have to deal with is around the seams or fittings of the liner leaking, especially in the case of older pools. The use of specialized seam sealants or professional help to repair these issues can be said to be the most effective way of resolving them as it provides a watertight seal and at the same time prolongs the life of the liner. Conducting regular checks will make it possible to detect such problems very early before they develop into more significant complications.
Thus by being educated about the methods of repair and the latest liner technological advancements like UV-resistant materials or improved adhesives, pool owners will be able to tackle these common problems in a manner that is very efficient. To keep the pool liner looking good for a long time, the pool owners need to combine their efforts with maintenance and repairs that are done promptly.
Extending the Life of Your Pool Liner
An exhaustive maintenance routine must be incorporated; otherwise, the swimming pool liner is bound to live a short life. The first thing is to treat the water with the right chemicals, with the pH level kept between 7.2 and 7.6, where the alkalinity is also balanced to avoid the liner’s wear and fading. It is necessary to clean the pool frequently as a way of removing the harmful materials like algae and dirt that are bacteria-prone and that can either tear or stain the liner. Moreover, using covers for the pool can help reduce the liner’s daily exposure to the sun and hence, preventing it from being degraded by UV light.
⭐ Pro Maintenance Tips
- Liner inspection should be done frequently in order to detect damage at the earliest stage, which may include inserting, discoloration, or enlargement of the area
- Timely intervention of minor problems, such as filling in a small leak, can lead to avoiding substantial repair costs and also lengthening the life of the liner
- Stronger, UV stabilized vinyl, and innovative protective coatings are among the materials that are being improved and thus, enabling liners to last longer than ever
- The use of these state-of-the-art products will not only provide the liners with better environmental conditions resistance but also lower the frequency of their maintenance
When traditional care practices are complemented with modern innovations and preventive measures, pool liners will remain the source of not only maximum performance but also aesthetic beauty for many years.
References
- University of Colorado – Phthalate-Free Pool Liner: Discusses innovative pool liner installations with non-slip surfaces.
- City of Long Beach – Pool Liner Replacement: Covers a case study on pool liner replacement, including costs and contractor details.
Frequently Asked Questions (FAQ)
❓ How long does it take in the average to have a pool liner installed?
Generally, the installation of a pool liner to the average pool of either an above or inground type will usually take around one to three days. This mainly gives consideration to the removal of the old liner, floor repair of the pool, or new liner installation. Removing the old liner and then prepping the whole pool can extend the time taken; however, if you replace and reinforce the liner in an inground pool and the liner is positioned well, there will not be delays as the liner bead in the track will easily seat.
❓ What do you do first when the old liner is being taken off and when a new one is being prepared?
The first step you should do before placing your new liner is to drain the pool and remove the old liner entirely, together with any liner lock or liner bead that may be left in the track. The next step is to check the liner track, inspect the pool floor and pool step for possible damages, and finally, clean all the debris. If you would like to install the main drain or repair the floor of the liner area, then this is the time to do it. By making sure that the liner track and the walls are in good condition, you will not face problems when pulling the liner across the pool and securing it in place.
❓ What is the correct method to pull the liner and get the liner bead into the track?
The very first thing you should do is to unroll the new liner and put the center of the pool lining right at the center of the sheet, and only after that pull the liner across the pool towards its ends. Work with the center to the ends and from side to side to match any pool shape. Ask a friend to help you guide the liner bead into the liner track and once done, lock the liner tightly into the track. Pulling too hard on the liner may either stretch it or cause damage, thus be extra careful when pulling it and use a liner lock tool if necessary to maintain the liner bead all around the pool.
❓ How do you prevent wrinkling with the liner and make it fit any pool shape?
When the liner is in the liner track around the pool and the bead is locked, use a vacuum designed for liners or a hose behind the liner with the gentlest suction to get rid of air and water pockets. Working from the middle of the pool toward the walls and corners of the pool helps eliminate wrinkles; for pool step areas, tuck in the step of the pool liner carefully and smooth out the material. Getting the liner snugly into the track and allowing the pool to fill slowly aids in the liner conforming to the curves and the floor of the pool without tearing or folds.
❓ Can I install a liner even if there are pool lights and other fittings in place?
Absolutely, but you have to make either fixture cutouts or use light housings that are specifically designed for liners. Before applying the new liner, first take off or secure pool light fittings and make sure the liner has accurately sized openings. Then place the light trim and connect the fittings as per the manufacturer’s instructions. Ensuring proper positioning of the liner around the light and that the liner is set before filling the pool will help to avoid leaks and damage in the area of the pool light.
❓ What are the things I should watch for when the pool is filling, and the liner is in the pool?
While the pool is being filled, keep an eye on the top of the liner to check that it is still in the track and that the liner is tightly fitted without any folds at the top of it. Look at the corners of the pool and the step area for any shifting. Continue to use a liner vacuum until the liner fits the shape of the pool’s floor and the liner is in place. Do not fill too fast; a slow even fill supports the liner bead seating and prevents the formation of air pockets behind the liner.
❓ What measures should be taken to avoid damaging the pool or liner during installation?
Damage can be avoided by carrying out an inspection of the pool floor and the liner track and doing any necessary repair work before the beginning of installation. Do not exert excessive force on the liner while pulling— pulling may result in tearing or stretching of the material at the seams. Keep all cutting and sharp tools away from the surface of the liner and also, balance the pool chemistry before the first swim to prevent lapel deterioration. If the liner is not set correctly, it is better to remove it and refit than to force it into place.
❓ When should I consider replacing my liner and how can I tell if I should replace an inground pool liner?
If you see continuous leaks, seam separation that is visible, big cuts, or heavy wrinkling that is not easy to smooth after correct installation, it’s time to consider replacement. Additionally, significant fading, loss of elasticity, or a liner that consistently slips from its track are clear indicators that a new liner is needed to maintain your pool’s integrity and appearance.
Ready to Install Your Pool Liner?
Follow this comprehensive guide to achieve professional results and enjoy your beautiful pool for years to come. Remember, patience and attention to detail are key to a successful installation!

