
Waterproof Tarp Repair: Restore Leak Protection
Waterproof tarp repair starts with cleaning and drying the damaged area, applying a patch or tape that extends 1-2 inches beyond the tear on all sides, and using an adhesive compatible with your tarp material. For PVC tarpaulin, hot-air welding creates the most durable waterproof bond, while polyethylene tarps respond best to heat-sealed patches and canvas requires sewn patches with seam sealer. The difference between a successful repair and a recurring leak usually comes down to matching the repair method to the material and verifying that the fix actually restores waterproof integrity.
A patch that holds structurally but lets water through is not a repair. It is a delayed replacement. In industrial settings, that delay can mean cargo damage on a flatbed, equipment corrosion on a construction site, or harvest loss on a farm. Most DIY guides focus on closing a tear, but they rarely address whether the tarp will stay dry under load, wind, and repeated rain.
This guide explains how to diagnose the root cause of a tarp leak repair, choose the right waterproof tarp repair method for each material, and validate that the fix works. Whether you manage a logistics fleet, operate agricultural covers, or maintain marine protection, the goal is the same: restore the waterproof barrier so your assets stay protected. Not sure which waterproof tarp is best for rain, construction, or outdoor storage? The LY TRUSTLINK team is ready to help you choose the right solution.
Key Takeaways
- Seam failure, UV degradation, and grommet tears cause most leaks, not the fabric itself.
- Poly tarps need heat-sealed or tape patches; canvas needs sewn patches plus seam sealer; PVC tarpaulin responds best to adhesive patches or hot-air welding.
- A proper patch overlaps the damage by 1-2 inches on all sides and is applied to a clean, dry surface.
- Always test repairs with a hose spray or pooling water test before returning the tarp to service.
- When UV degradation has made the fabric brittle, replacement with heavy-duty PVC tarpaulin is usually more cost-effective than repeated repairs.
Why Is My Tarp Leaking? A Diagnostic Guide
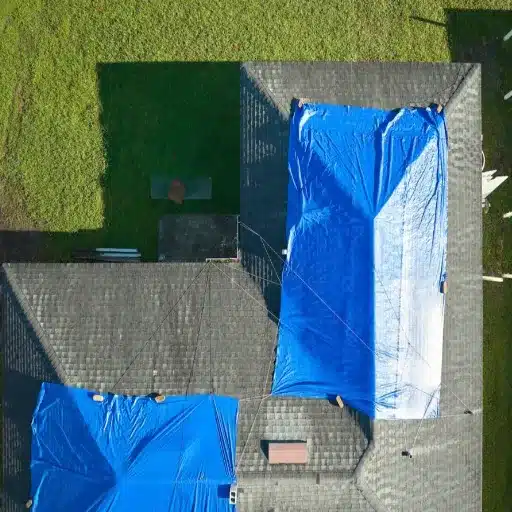
Before reaching for a tarp repair kit, identify where the water is entering. The visible tear is not always the real failure point. A systematic inspection prevents wasted effort and repeated leaks.
Marcus, a fleet manager in Ohio, noticed water damage on a pallet of electronics under a truck tarp. The tarp had no visible holes, but a close inspection showed a 6-inch separation along a heat-sealed seam. He had been preparing to patch the flat fabric. By finding the real failure point, he repaired the seam instead and avoided a recurring leak that would have caused another cargo claim.
Pinholes and Punctures
Small holes from branches, tools, or fasteners are easy to miss but allow steady water intrusion. Hold the tarp up to a light source or run a hand underneath while spraying the top with water. Pinholes often appear near high-wear areas where the tarp contacts frames, cargo edges, or tie-down hardware.
Seam Failure
Seams are the most common leak path on any tarp. Heat-sealed polyethylene seams can split under flex stress. Sewn canvas seams rely on thread and seam sealer, both of which degrade. PVC seams that are not RF-welded or hot-air bonded can separate under tension. If water appears along a seam line rather than in the field of the fabric, the seam itself needs repair.
Coating Degradation and UV Damage
UV radiation breaks down the polymer chains in polyethylene and weakens the surface finish on PVC. The fabric may look intact but no longer beads water. You will notice this when water soaks into the surface rather than running off. Once UV degradation causes micro-cracking across a large area, patches are only temporary fixes.
Edge and Grommet Tears
Grommets concentrate pulling force into a small area. A torn grommet or frayed edge creates a leak path and often propagates into the body of the tarp. Reinforcing the area behind the grommet is usually necessary, not just replacing the metal ring.
Factory Defects and Stress Points
Less common but worth checking: weak weld spots, inconsistent coating, or folds that have been stressed repeatedly. These usually appear in the first weeks of service and should be addressed under warranty rather than patched.
Need more information about waterproof tarp performance in harsh weather conditions? Get in touch with LY TRUSTLINK for expert consultation and product support.
Waterproof Tarp Repair by Material Type
The right repair method depends on the tarp material and the type of damage. Using the wrong adhesive or patch material is one of the main reasons repaired tarps continue to leak.
| Material | Common Failure | Best Repair Method | Waterproof Restoration |
|---|---|---|---|
| Polyethylene (poly) | Holes, split heat-sealed seams, UV micro-cracks | Tarp repair tape or heat-sealed patch | Good for small damage; limited once UV degradation spreads |
| Canvas | Tears at seams, worn waterproofing, grommet tears | Sewn patch + seam sealer or wax reproofing | Excellent if fabric base is sound |
| Vinyl / PVC | Tears, separated seams, abrasion | PVC adhesive patch, vinyl cement, or hot-air welding | Excellent; welding restores factory-level seam integrity |
Polyethylene Tarps
Poly tarps are built from woven HDPE scrim laminated with polyethylene film. The waterproofing comes from that film layer. Once it is punctured, the repair must recreate a continuous film barrier. Lowe’s recommends adhesive patches or heat sealing for polyethylene and vinyl tarps rather than sewing, since needle holes create new leak paths.
For small holes, clean the area with mild soap and water, let it dry, and apply a polyethylene repair tape that overlaps the damage by at least 1 inch on all sides. For larger tears or split seams, a heat-sealed patch provides better longevity. A heat gun or sealing iron melts the patch and tarp together, forming a bond without adhesive failure risk.
Canvas Tarps
Canvas is naturally water-resistant but relies on treatment for full waterproofing. A tear in canvas is best repaired by sewing a canvas patch with heavy-duty UV-resistant thread, then applying a liquid seam sealer or wax treatment over the stitches. The stitches provide structural strength; the sealer closes the needle holes.
If the canvas has lost its overall water repellency, a patch alone will not solve the problem. The entire surface may need reproofing with wax, oil, or a PU spray. Our guide on how to waterproof a tarp covers full-surface treatments in detail.
Vinyl and PVC Tarpaulin
PVC-coated fabrics are the standard for heavy-duty waterproof tarpaulin because the PVC coating bonds to a high-tenacity polyester base. Small holes can be patched with a PVC-compatible adhesive such as HH-66 vinyl cement. Cut the patch from matching PVC fabric, round the corners to prevent peeling, and apply adhesive to both the patch and the tarp. Press from the center outward with a roller to eliminate bubbles.
For PVC tarpaulin repair on seams or large tears, hot-air welding is the most reliable method. A hot-air gun softens the PVC while a pressure roller fuses a welding rod or overlapping patch into the fabric. This creates a molecular bond that matches the original seam strength. TAK Techtextil explains that heat sealing, high-frequency welding, and hot-air welding are preferred over gluing for industrial PVC applications because they produce stronger, continuous seams.
Need a cover that won’t need frequent repairs? See our guide to choosing the right waterproof tarp for specifications by application.
Patching Holes and Tears: A Waterproof Tarp Patch Guide
A proper patch is more than a sticker over a hole. It must restore the continuous waterproof barrier and withstand the tension and movement the tarp experiences in service.
Elena supervised a construction site in Seattle where a falling tool left a 4-inch tear in a PVC scaffolding cover. Her first crew applied duct tape from the hardware trailer. The patch held for two days before peeling in the rain. The second repair used a PVC patch, HH-66 vinyl cement, and a 2-inch overlap on all sides. After curing for 24 hours, the repair passed a hose spray test and remained watertight through the rest of the project.
Surface Preparation
Clean the damaged area with mild soap and water or isopropyl alcohol. Remove dirt, oil, and mildew. Let the surface dry completely. Any moisture trapped under the patch will prevent adhesion and create a leak path. For PVC repairs, lightly roughening the surface with fine sandpaper can improve adhesive bonding.
Patch Selection and Sizing
Use patch material that matches the tarp: polyethylene patch for poly tarps, canvas for canvas, PVC for PVC. A quality waterproof tarp patch should extend 1-2 inches beyond the damage on all sides. Rounded corners resist peeling better than square corners. For high-stress areas, apply patches to both sides of the tarp.
Adhesive Application
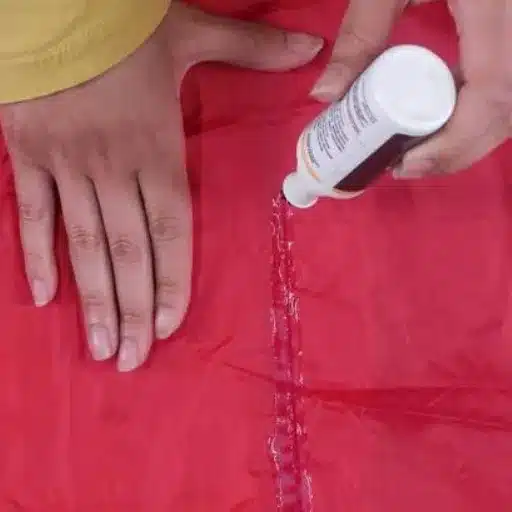
Apply adhesive evenly to both the patch and the tarp surface. Wait until the adhesive becomes tacky, usually 2-5 minutes, before pressing the patch into place. Smooth from the center outward to push out air bubbles. Use a hard roller or the edge of a stiff card for full contact.
Curing Time
Most vinyl cements require at least 24 hours for full cure, though some industrial formulations set enough for handling within minutes. Do not subject the repair to tension, water, or temperature extremes during curing. US Cargo Control notes that its vinyl cement typically needs at least 24 hours to reach full bond strength.
Emergency Field Repairs
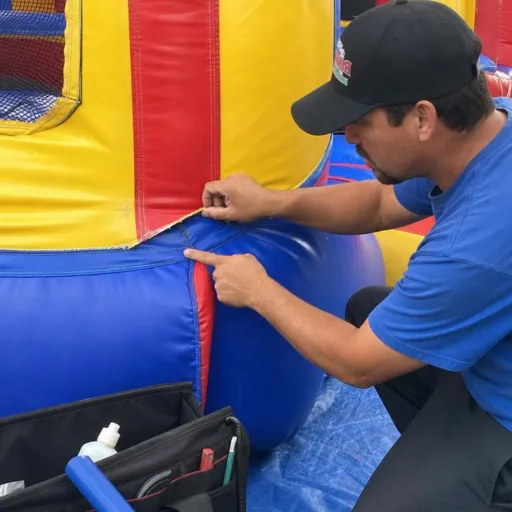
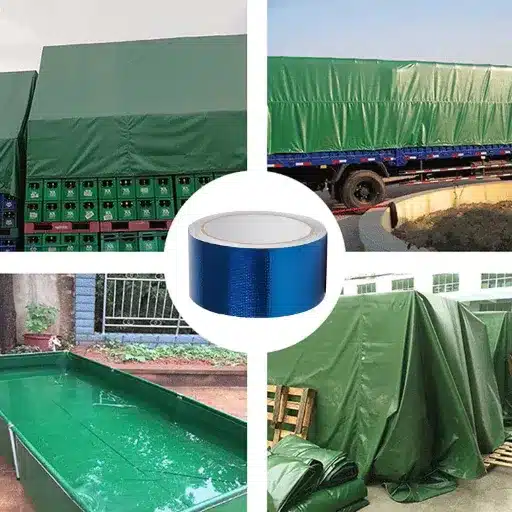
In the field, a waterproof tarp repair kit or waterproof tarp repair tape can stop a leak temporarily. Clean the area as well as possible, dry it with a cloth, and apply tape with firm pressure. Duct tape is not recommended for long-term use because the adhesive breaks down under UV exposure and the polyethylene backing loses waterproofing.
Seam Repair and Sealing in Waterproof Tarp Repair
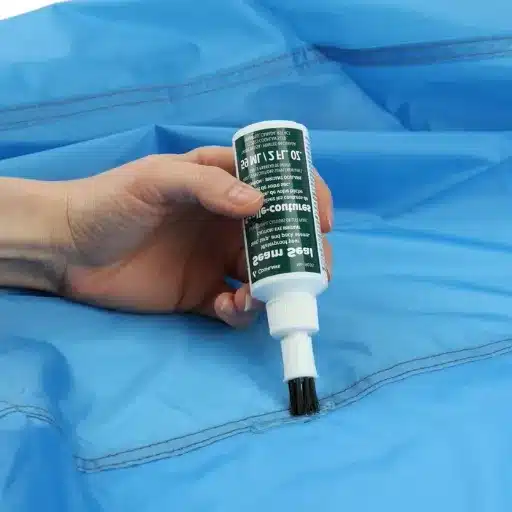
Seams handle more stress than the flat fabric. They flex, pull, and bear load every time the tarp is tensioned. A seam repair must restore both strength and waterproofing.
Re-sealing Polyethylene Seams
When a heat-sealed poly seam splits, the best repair is to re-heat-seal it. Overlapping the seam by 1-2 inches and applying heat and pressure rebuilds the film barrier. If heat sealing is not practical, a waterproof tape designed for polyethylene can bridge the gap, though it is usually a shorter-term solution.
Sewing and Waterproofing Canvas Seams
For canvas seams that have separated, sew with a heavy-duty needle and UV-resistant polyester or nylon thread. Use a double-stitch pattern: one line along the seam edge and a second line inset for reinforcement. After sewing, brush a waterproof tarp seam sealer along the stitch line and let it cure. This closes the needle holes and restores flexibility.
PVC Seam Repair
Small separations in PVC seams can be repaired with PVC adhesive and a reinforcing strip of matching fabric. For load-bearing seams on truck tarps, construction covers, or marine applications, hot-air welding is the professional standard. The welded seam restores the tensile strength and waterproof bond that the original seam provided.
For detailed guidance on seam sealing as a preventive measure, see our article on how to waterproof a tarp.
Restoring Waterproof Coatings
Sometimes the fabric has no holes, but water no longer beads on the surface. The coating has degraded. Restoring it is possible in some cases and futile in others.
When Coating Restoration Is Possible
If the base fabric is still strong and the degradation is limited to surface treatment, re-coating can extend service life. This works best on canvas and nylon tarps. PU sprays restore water repellency to fabric tarps. Wax or oil treatments restore canvas. The key is to repair any tears first, then apply the treatment to a clean, dry surface.
Re-waxing Canvas
Heat the wax until liquid, brush it evenly across the canvas, and use a hair dryer or heat gun to help it penetrate the fibers. Apply thin coats rather than one thick layer. Excess wax can crack and flake. After cooling, test a small area with water to confirm beading.
UV Protectants for PVC and Vinyl
PVC tarpaulin does not need re-waterproofing in the same way fabric tarps do because the PVC layer itself is the waterproof barrier. However, UV protectant sprays can slow surface degradation and extend the material’s service life. Regular cleaning and inspection are more important than coating restoration for PVC.
When Coating Restoration Is Futile
If the polyethylene film is covered in micro-cracks, if the canvas is threadbare, or if the PVC has become stiff and cracked, no surface treatment will restore waterproofing. At that stage, the tarp should be replaced. Continuing to patch a degraded tarp increases the risk of sudden failure under load.
Repairing Grommets and Edges
Grommet failures often cause larger tears because the entire load concentrates at one point. A proper repair redistributes that load.
Replacing Torn Grommets
Cut a new hole at least 1 inch away from the torn area. Install a new grommet using a grommet kit and setting tool. Place a reinforcing patch of matching fabric on the back side of the tarp behind the grommet. This distributes pulling force across a wider area and prevents the new grommet from tearing out.
Reinforcing Edges with Webbing
Frayed edges can be reinforced by folding a strip of webbing or heavy fabric tape along the edge and sewing or welding it in place. This strengthens the perimeter and provides a better anchor for tie-downs.
Load Distribution Best Practices
Use bungee cords or elastic tie-downs where possible to allow the tarp to flex without shock-loading the grommets. Avoid pulling any single grommet at an extreme angle. Even a strong tarp will fail if the attachment points are overloaded.
Testing Your Waterproof Tarp Repair
A repair is not complete until it has been tested. Field verification prevents surprises during the next storm.
Visual Inspection
Check the repair for bubbles, wrinkles, lifted edges, or gaps. Press firmly along the patch perimeter. If any area lifts, reapply adhesive or tape.
Hose Spray Test
Lay the tarp flat or at a slight angle. Spray the repaired area with a garden hose for several minutes, simulating moderate rainfall. Check the underside for moisture. Focus on seams and edges, not just the patch center.
Pooling Water Test
For flat areas, create a shallow pool of water over the repair and let it stand for 15-30 minutes. This tests whether the repair can withstand sustained hydrostatic pressure, which is more demanding than spray.
Air Leak Test
For tensioned covers, inflatable structures, or truck side curtains, an air leak test can reveal pinholes that water testing misses. Apply soapy water to the repair area and look for bubbles forming under air pressure.
Repair vs. Replace Decision Framework
Not every tarp is worth repairing. The decision should be based on total cost of ownership, safety risk, and the condition of the base fabric.
David operated a grain storage facility in Kansas and spent three seasons patching blue poly tarps after every windstorm. Each repair cost little, but the accumulated labor, downtime, and spoiled grain added up. After calculating the annual cost, he switched to 600gsm PVC tarpaulin covers. The upfront cost was higher, but the covers lasted through five seasons without a single leak, cutting his protection cost per year by more than half.
Cost Threshold Analysis
Compare the repair cost, including labor and downtime, against the replacement cost and expected remaining life. A cheap poly tarp that requires multiple tape patches is usually not worth the effort. A heavy-duty PVC tarpaulin with one localized tear is almost always worth repairing.
Safety Considerations for Load-Bearing Tarps
For truck tarps, construction safety netting, and overhead covers, a failed repair can create liability. If the tarp supports snow load, protects workers, or secures cargo, err on the side of replacement when the damage is near a seam, edge, or high-stress point.
UV Degradation as the Point of No Return
When the fabric becomes brittle, faded, or cracked across a wide area, patches will not adhere well and new tears will continue to form. This is especially common in poly tarps that have been exposed to sun for more than 12 months. At that stage, replacement is the only reliable option.
When Upgrading to PVC Tarpaulin Makes Sense
If repairs are becoming frequent, the application is demanding, or the tarp protects high-value assets, upgrading to heavy-duty PVC tarpaulin reduces long-term cost. PVC tarpaulin typically lasts 5-10 years with proper maintenance, compared to 6-12 months for standard poly tarps. For specifications and custom sizing, contact our engineering team.
Preventing Future Leaks
The most cost-effective repair is the one you do not have to make. Preventive care extends tarp life and maintains waterproof performance.
Proper Tension and Installation
A loose tarp flaps in the wind, causing abrasion and fatigue at attachment points. An over-tensioned tarp concentrates stress at seams and grommets. Install the tarp with even tension across all anchor points and allow slight flex for wind movement.
Regular Inspection Checklist
Inspect tarps monthly during active use and before seasonal storage. Look for:
- Loose or torn grommets
- Separating seams
- Surface cracking or flaking
- Pinholes in high-wear areas
- Mold or mildew, which can weaken fibers and coatings
Cleaning and Storage Best Practices
Clean tarps with mild soap and water. Avoid harsh solvents that can degrade coatings. Let the tarp dry completely before folding or storing. Store in a cool, dark place to minimize UV and heat exposure.
UV Protection and Maintenance Schedules
For long-term outdoor installations, consider UV protectant treatments and schedule periodic re-tensioning. Rotating or repositioning the tarp can also reduce uneven UV exposure and wear patterns.
Frequently Asked Questions About Waterproof Tarp Repair
What is the best waterproof tarp repair method?
The best method depends on the material. Hot-air welding gives the strongest bond for PVC tarpaulin, heat-sealed patches recreate the film barrier on polyethylene, and sewn canvas patches finished with seam sealer restore fabric tarps.
Can duct tape be used for tarp leak repair?
Duct tape can serve as a short-term emergency field repair, but the adhesive breaks down under UV exposure and the backing loses waterproofing. For a lasting fix, use a waterproof tarp patch or tape designed for the specific material.
How long does a waterproof tarp patch last?
A properly applied waterproof tarp patch can last from several months to multiple years, depending on UV exposure, flex stress, and material quality. A welded PVC repair can last as long as the original fabric.
What is the best waterproof tarp seam sealer?
For canvas, liquid PU or wax-based seam sealers work well. For polyethylene and PVC seams, heat sealing or hot-air welding restores waterproofing more reliably than liquid sealers alone.
Is PVC tarpaulin repair better than replacing the tarp?
For localized damage on otherwise sound fabric, PVC tarpaulin repair is usually the most cost-effective choice. If the material has become stiff, faded, or cracked across a large area, replacement is the safer long-term investment.
Conclusion
Waterproof tarp repair is not about hiding damage. It is about restoring the barrier that protects cargo, equipment, and facilities from water intrusion. The process starts with a clear diagnosis, continues with a material-matched repair method, and ends with testing that confirms the fix holds.
Poly tarps, canvas, and PVC tarpaulin each require different approaches. Tape and heat sealing work for polyethylene. Sewing plus seam sealer works for canvas. Adhesive patches and hot-air welding work for PVC. When the base fabric is degraded, the smartest decision is usually replacement, ideally with a material engineered for the application’s demands.
If your operation depends on reliable waterproof protection, the goal is not to keep patching the same tarp. It is to specify a cover that does not fail in the first place. Request a consultation with our engineering team to discuss heavy-duty PVC tarpaulin options, custom dimensions, and specifications for your environment.