
Grommet Installation: Types, Spacing & Best Practices
In creating projects that are durable, professional, and pleasing to the eye, grommets are indispensable as they contribute to both functionality and aesthetics. Proper grommet installation can make a significant impact, whether you are dealing with banners, curtains, tarps, or any other type of material. But what is the process of selecting the proper grommet for your application? What are the spacing norms that would secure both aesthetics and strength? What are the steps that should be taken in the grommet installation process to attain a clean and durable finish? This guide will lead you through the world of grommet installation, addressing questions such as the different types of grommets available, the best ways to space them, and essential tips for making your projects robust. Therefore, continue reading to fortify your skills with the proper knowledge and to ensure a perfect finish every time.
Understanding Grommets and Their Importance in Tarpaulins
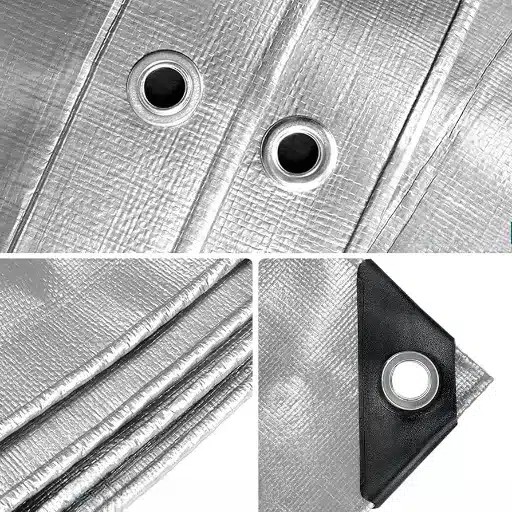
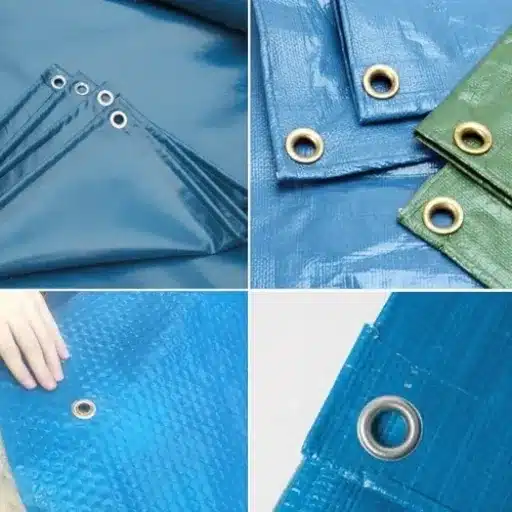
Grommets are undeniably crucial for the longevity and usability of tarpaulins. They are reinforced openings through which ropes or fasteners can hold the tarpaulin securely without damaging the fabric. Grommets are usually metal or plastic and they are the main reason for preventing the fabric from wearing out and the tension being evenly spread out through the opening. Thus, grommets are very important for tarpaulins in heavy-duty situations or continuous outdoor use, where they not only help the material stay stable but also prolong its life. When correctly installed and spaced, the grommets ensure the tarpaulin functions properly, whether it is used for covering goods, making a shelter, or other practical purposes.
What is a Grommet?
A grommet is a tiny circular ring or eyelet, usually made from metal, rubber, or plastic, designed to fortify and support holes in fabrics or other media. It extends the lifespan of a hole and prevents the area around the opening from tearing when force or strain is applied. Grommets are used mainly in textile fabrics like tarpaulins, banners, and curtains, but also in industrial settings. They absorb the tension and stress of the material, helping to protect it from damage.
Today’s grommets come in different sizes and uses. To illustrate, in electronics, rubber grommets are used to cover wires or cables passing through sharp-edged gaps, thereby minimizing the risk of wear and electrical hazards. Looking at it from a larger perspective, grommets offer a mix of practical use and ease of handling, making them integral to daily items such as shoes, clothes, and outdoor coverings. Their broad application highlights their necessity and relevance in many different industries.
Benefits of Using Grommets in Tarpaulins
- ●Enhanced Durability: The edges of tarpaulins are reinforced with grommets and this prevents tearing, especially under tension and harsh weather conditions.
- ●Secure Tie-Downs: A strong anchoring point is provided by them, which allows securing the tarpaulins firmly to either structures or objects.
- ●Versatility: The use of grommets makes the tarpaulins flexible in their uses, such as covering equipment, making shelters or securing loads.
- ●Weather Resistance: Grommets make sure the proper fastening is done which helps the tarpaulins to be very effective in shielding against rain, wind and UV rays.
- ●Ease of Installation: Grommets make it easy to set up tarpaulins which allows for a quick and efficient deployment using ropes, bungee cords or hooks.
Common Applications of Grommets in Tarpaulins
- ●Construction Sites: Punctured to accommodate grommets, tarpaulins serve as a protective layer for both building materials and tools against the elements.
- ●Camping and Outdoor Activities: The ease of setup and durability make them very suitable for tents, ground covers, or just sheltering in the outdoors.
- ●Transportation and Hauling: Grommet-equipped tarpaulins are favored as a means of covering and tying down the cargo on trucks, trailers, or boats.
- ●Agriculture: The same grommet incorporation that provides the farmers with a tarp of great strength and durability is used to construct grommeted tarps that protect crops, hay, or equipment from the elements.
- ●Event Planning: Besides being used for the above purposes, these tarpaulins are employed in various events as shading structures, ground protection, or even as temporary backdrops.
Types of Grommets for Tarpaulin Installation
There are various types of grommets for tarpaulin installation, including brass, stainless steel, aluminum, plastic, and rubber grommets.
| Type | Material | Durability | Corrosion | Usage |
|---|---|---|---|---|
| Brass | Metal | High | Resistant | General purpose |
| Stainless | Steel | Very high | Highly resistant | Heavy-duty tasks |
| Aluminum | Metal | Medium | Resistant | Lightweight needs |
| Plastic | Synthetic | Medium | Non-corrosive | Temporary use |
| Rubber | Flexible | Low | Non-corrosive | Sealing or waterproofing |
Metal vs. Plastic Grommets
Metal grommets are stronger, more durable, and suitable for heavy-duty applications, while plastic grommets are lightweight, non-corrosive, and ideal for temporary or softer materials.
| Attribute | Metal Grommets | Plastic Grommets |
|---|---|---|
| Durability | High | Medium |
| Corrosion | Resistant | Non-corrosive |
| Strength | Very high | Moderate |
| Weight | Heavy | Lightweight |
| Cost | Higher | Lower |
| Usage | Heavy-duty | Temporary |
| Material | Metal | Synthetic |
| Flexibility | Rigid | Flexible |
Choosing the Right Grommet for Your Tarp
Choosing the proper grommet for your tarp is primarily determined by your own needs and situation. Suppose you need a tarp for heavy-duty applications, such as prolonged outdoor use or industrial activities. In that case, metal grommets are your best bet due to their durability, strength, and resistance to wear and tear. But plastic grommets will do just fine for lighter, more temporary, or budget-conscious projects, since they are a more cost-effective and lightweight choice. Moreover, in places where moisture or chemicals cause corrosion, plastic grommets are ideal since they are non-corrosive and more flexible than their metal counterparts. So, once you know your intended use case and the environmental conditions, you can decide on the grommet that best fits your tarp.
Overview of Grommet Kits
Grommet kits are handy aids made for users who wish to apply grommets in a fast and professional way. Usually, a kit comes with different sizes of grommets, installation tools such as hole punches and setting dies, and clear instructions for use. These kits are suitable for jobs like mending tarps, making banners, or reinforcing fabric. They are designed for both novices and pros, providing all the necessary resources for accurate and strong grommet placement. The choice of the right grommet kit is determined by the needs of the project, such as the type of material, size of grommet, and how often it will be used.
Grommet Installation Techniques for Tarpaulins

To put grommets onto tarpaulins, first, indicate the points with a pencil or marker, making sure they are equally spaced and match the edges of the tarp. The next step is to punch holes in the marked places using a hole punch, ensuring the holes are clean and open. Push the grommet’s base through the hole from one side and place the top ring on it on the other side. With the help of a setting die and mallet, lock them together tightly, according to the grommet kit instructions. Do this for all the pointed positions to get a strong, professional-looking finish.
Tools Needed for Grommet Installation
- ●Grommet kit, which consists of grommets, setting die, and top ring
- ●Hole punch
- ●Mallet or hammer
- ●Marker or pencil for marking
- ●Measuring tape or ruler
- ●Protective surface or workbench for support
Step-by-Step Guide to Installing Grommets for Tarpaulins
1. Prepare the Tarpaulin
First of all, you need a tarpaulin that has already been flattened out. Also, the surface where you will be working should be clean and quite strong. Make sure that the area where you will put the grommets is without dirt or wrinkles.
2. Mark the Grommet Locations
Use a measuring tape or ruler to mark the exact places on the tarpaulin where you would like the grommets to be positioned. Then use a marker or pencil to make an unmistakable mark at every position.
3. Punch Holes for the Grommets
Position the hole punch on the corresponding point of each mark and either press or hammer down to make a hole. The hole needs to be of the same size as the grommets you are using.
4. Insert the Grommet
Take the upper part of the grommet and insert it through the hole from the tarpaulin’s front side. Make sure that it is tight.
5. Position the Backing Ring
The grommet’s backing ring should be placed on the tarpaulin’s back side and it should be matched with the top ring.
6. Secure the Grommet
Put the setting die over the grommet and tap it gently with a mallet or hammer. Be sure to follow the instructions that come with the grommet kit for getting a tight, secure fit.
7. Repeat for Additional Grommets
Carry out the same procedure for all the marked points until you have fitted all the grommets. Make sure to check each one for stability and that it is in the correct position.
After executing these activities, you will get a professionally finished and strongly reinforced tarpaulin.
Common Mistakes to Avoid During Installation
- ✖Skipping Measurements – If you do not measure and mark the exact locations for the grommets, it can lead to uneven spacing and misalignment.
- ✖Using the Wrong Tools – Installation of grommets can be done with proper tools only; otherwise, material may be damaged or grommets will be poorly set.
- ✖Overhammering the Grommet – The excessive force exerted on the grommet while hammering can cause it to collapse or injure the fabric around it.
- ✖Ignoring Material Compatibility – If it is not taken into account that the grommet size and material are suitable for the fabric, weak reinforcement or tearing may happen.
- ✖Rushing the Process – If you do not follow the instructions and work too fast, you may make mistakes, such as loosening or incorrectly setting the grommets.
Proper Spacing for Grommets on Tarpaulins

On tarpaulins, grommets are usually spaced 18 to 36 inches apart, but the proper spacing really depends on the purpose of the tarp and the strength of the material. For heavier-duty applications or when increased tension is needed, closely spaced grommets, e.g., every 12 to 18 inches, provide better reinforcement and longer life. Consistent spacing is essential because it helps with even stress distribution over the tarp.
Determining Optimal Grommet Spacing
If you want to find the best grommet spacing for tarpaulins, follow these guidelines:
- ●Light Duty Use: Support for general applications is planned grommets 24 to 36 inches apart.
- ●Heavy Duty Use: Close grommets, usually 12 to 18 inches apart, to have higher tension and stress handling.
- ●Material Factors: Tearing prevention calls for spacing adjustment according to the strength and thickness of the tarpaulin material.
- ●Application Needs: Load conditions, environmental exposure, and specific use case are factors to consider when deciding on spacing.
It is imperative that the spacing is even so that the strain is distributed uniformly and the tarpaulin lasts longer.
Factors Influencing Grommet Placement
- ●Wind Conditions: Areas with high wind might need closer spacing of grommets to avoid excessive flapping or even damage of tarpaulin.
- ●Support Structure: Grommet positioning is affected by the type and distance of supporting framework to ensure that the attachment and tension are proper.
- ●Weight Distribution: In the case of heavier loads, grommets are to be placed additionally to spread the weight evenly and lessen the stress on each point.
- ●Customization Requirements: Certain uses like banners or covers might require customized grommet spacing to fulfill the specific outside or functional needs of the design.
- ●Frequency of Use: Tarpaulins that are often put up and taken down might get the advantage of having grommet placement reinforced so that they can last out the prolonged wear and tear.
Adjusting Spacing for Different Tarp Uses
When different grommet spacings for tarp uses are being adjusted, it is crucial to consider the distinct demands of the environment and the application’s operation. Sturdy tarps subject to strong winds or heavy loads require closer grommet spacing—usually about 12 to 18 inches apart—which not only provides added stability but also reduces stress points. Conversely, lightweight tarps that are utilized for continuity in the temporary coverage area require grommet spacing that is about 24 to 36 inches apart which is a way of saving on the material resources while still providing support that is considered adequate. For custom projects, exact dimensions, weight and intended use of the tarp should be taken into consideration while consulting with industry standards or manufacturers for optimal spacing guidelines. By adjusting the grommet spacing, one can considerably increase the lifespan and usefulness of the tarp in its designated area.
Best Practices for Maintaining Grommets on Tarpaulins
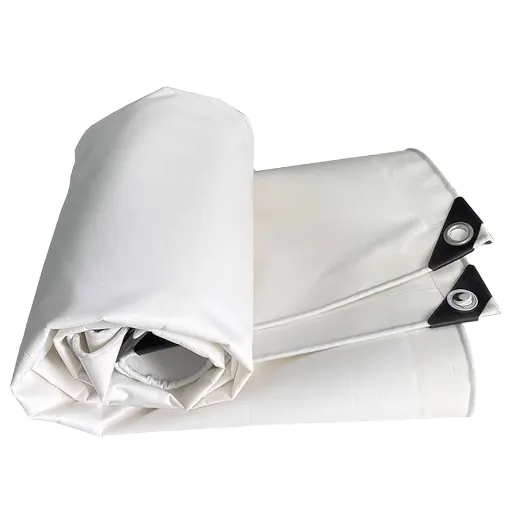
To keep grommets in shape on tarpaulins, periodically check them for signs of wear, rust, or damage. If any grommet is found weak, replace it immediately to avoid further tearing. When the tarp is secured, ensure the tension is just proper so that the grommets do not become overstretched. If needed, use reinforced edges or grommet repair kits to prolong the life of the grommets. Moreover, keep tarpaulins in a dry and cool place so that their exposure to moisture and UV rays is reduced as these factors can weaken both the tarp and its grommets in the long run.
Inspecting Grommets Regularly
For grommet inspection, I will check every grommet for dependence, damage, rust or wear. I will also check that they are all securely fastened and will replace any grommet that seems to be so. This way, I will be able to keep the tarpaulin in good condition, which will also extend its overall lifetime.
Repairing or Replacing Damaged Grommets
Repairing damaged grommets on tarps is sometimes possible, and with the correct tools, their functionality can be restored. To start, use a hole punch or a grommet removal tool to remove the damaged grommet. Be sure that the hole is clean and not torn. After that, place a new grommet in the hole, make sure it is properly aligned, and fix it using a grommet setting tool or press. If the fabric around the grommet is also damaged, first, make the area stronger with a patch to give extra support before covering the grommet. But if the damage is too significant, then the tarp should be replaced entirely to keep it effective. Regular maintenance and quick repairs can significantly increase the tarp’s lifespan.
Storage Tips for Tarpaulins with Grommets
- ✓Clean Thoroughly Before Storage – Make sure the tarp is absolutely clean and dry to stop mold and mildew from growing. Before putting it away, soap and water will do the trick in cleaning up the tarp from dirt and debris.
- ✓Avoid Folding Along the Same Lines – While folding the tarp, change the fold lines each time so that the material is not stressed and there are no creases along the lines of wear.
- ✓Store in a Cool, Dry Place – Place the tarpaulin in a spot that is not exposed to sunlight and is not too moist to prevent UV damage and fabric degradation.
- ✓Roll Instead of Folding for Longer Storage – Tarp rolling will not only help in the reduction of creases but it will also avoid that the grommets or fabric get damaged during the long-term tarp storage.
- ✓Use Protective Coverings or Bags – Keep the tarp in a strong storage bag or wrap it in a protective cover that will not let dust, pests, or accidental damage get to it.
Reference Sources
-
-
Grommet Spacing Overview – Heavy Duty Tarps – Discusses grommet spacing and customization options.
-
How to Install Grommets, Hooks, and Tie-Downs on Your Custom Tarp – Tarp Supply – Covers grommet spacing and secure placement techniques.
-
Ultimate Guide to Using a Tarp Grommet Kit for Heavy Duty Applications – TY Tarp – Provides insights into grommet types, spacing, and quality considerations.
-
How to Install Grommets, Hooks, and Tie-Downs on Your Custom Tarp – Tarp Supply – A detailed guide on grommet installation and spacing.
-
How to Install Grommets: A Step-by-Step Guide – Hook and Loop – Explains grommet installation with recommended spacing and common mistakes to avoid.
-
Frequently Asked Questions (FAQs)
What is grommet installation and why do I need grommets?
Grommet installation is the process of reinforcing holes in fabrics or other materials with small rings, called grommets, to avoid tearing. Grommets are needed to create sturdy, functional openings in the manufacturing process of tarps, banners, or upholstery, thereby increasing their lifespan and withstanding stress and wear.
How do I install grommets using a grommet tool?
First, use a hole cutter to punch a hole in the fabric, then install grommets with a grommet tool. The grommet and washer are placed through the hole, then a grommet setter or grommet pliers are used to firmly secure them in place giving a tight fit. This is a procedure that offers a robust and neat finish.
What is included in a grommet kit?
A grommet kit is something that usually has different sizes of grommets, washers, a grommet tool and sometimes even a hole cutter in it. The kit includes all the necessary items to quickly and easily install grommets on various materials without hassle.
How do I choose the right size of grommets for my project?
The process of choosing the correct size of grommets needs measuring the diameter of the hole that is required and picking grommets that will fit tightly in that hole. Consider the fabric’s thickness and intended use to determine the size and type of grommets that would be most effective.
How do I ensure a clean hole when installing grommets?
For the purpose of a clean hole, use a hole cutter that will give you the exact size of the grommet diamete. This not only prevents fraying but also provides the grommet with a precise opening for fitting. Always ensure the hole is cut in a stable position to maintain control and accuracy at all times.