Leak Repair Guide: Finding & Fixing Water Penetration
If you are using tarpaulin to protect equipment, cover patio furniture, or secure your campsite, a leak can easily become a headache in no time. Water coming through the tarpaulin not only renders it useless but also may cause damage to the items that were supposed to be protected. This manual removes the guesswork in dealing with the problem and guides you through practical steps to help spot leaks and carry out effective repairs. You will be introduced to everything from locating the tiny holes to determining the appropriate mending materials. Tarpaulin waterproofness and durability restoration will be your skill by the end of the guide. Make it a point to read the entire text so as not to miss out on your tarp’s longevity!
Understanding Tarpaulin Leaks

Tarpaulin leaks are usually the consequence of various factors such as wear and tear, mishandling, or prolonged exposure to severe weather. The tarp can develop small tears, punctures, or weak seams especially if it is a frequent user or its storage is not right. Moreover, prolonged exposure to sharp objects, heavy weights, or UV rays can weaken the tarp material, thus, making it more prone to leaks. It is essential to detect these problems early to avoid causing more damage.
The easiest way to detect leaks is to lay the tarpaulin out in a well-lit area and check it for holes or weak points. Also, pouring water over the tarp while watching for drips or seepage could be another method to identify the problem areas quickly.
The Fixing of Tarpaulin Leaks
Small adhesive repair patches or waterproof tape explicitly made for tarpaulins can be used to seal small leaks or punctures. In the case of a bigger tear, it is suggested that the area is sewn up with strong thread and then a waterproof sealant is applied to make sure the repair is leak-proof. Always adhere to the manufacturer’s instructions for wholesome results.
What Causes Tarpaulin Leaks?
Several reasons can lead to tarpaulin leaks, namely, environmental conditions and improper usage among others. Gradually, the harsh weather conditions like heavy rains, strong winds, and direct sunlight have a degrading effect on the material making it brittle or creating weak spots. If sharp objects from the debris or tools are not removed, they may puncture or tear the tarp. Moreover, improper handling, such as dragging the tarp over rough surfaces and using the tarp under excessive tension, may cause the tarp to develop stress fractures. Even regular wear and tear, particularly in the folds or creases, can weaken the waterproof properties of the tarp. However, if proactive measures are taken for these causes and proper maintenance is implemented, it is possible to prolong the life of a tarpaulin significantly.
Common Signs of a Tarpaulin Leak
- Holes, rips, or punctures made in the material that can be seen.
- Water that is gathered on the surface or dripping through the tarpaulin.
- Items underneath getting discolored or stained, which points to moisture coming through.
- Seams that are loose or worn, allowing water to pass through.
- Fabric that is bubbling or swelling, which is usually a sign of moisture being trapped.
The Importance of Timely Leak Repair
Repairing leaks in a tarpaulin immediately when spotting them is crucial for preventing damage and maintaining its optimal function. Waiting to repair can cause moisture to move around, leading to the weakening of the tarpaulin and the loss of its protective qualities. This not only shortens the tarpaulin’s lifetime but also increases the risk of items kept under it getting damaged due to prolonged exposure to water. Quick repair keeps the tarp strong and suitable for use, reducing the need for expensive replacements and causing minimal disruption to the business from unexpected failures. Pro-active maintenance and the immediacy of repairs to leaks not only protect your investment but also the goods that the tarpaulin is meant to protect.
DIY Tarpaulin Leak Repair Techniques

If you want to carry out tarp leak repair efficiently, consider following the given steps one by one:
With these steps, you will have a quick and inexpensive method of restoring your tarpaulin’s usability.
Using Tape for Quick Fixes
If I want to make the tear in the tarp unnoticeable immediately, I would use tape and start with a thorough cleaning and drying of the area around the damage. Then, I take a strong waterproof tape like duct tape or repair tape and stick it firmly over the tear. To make it more durable, I put tape on both sides of the tarp ensuring the edges are really sealed. This way gives a quick, temporary solution to keep the tarp working.
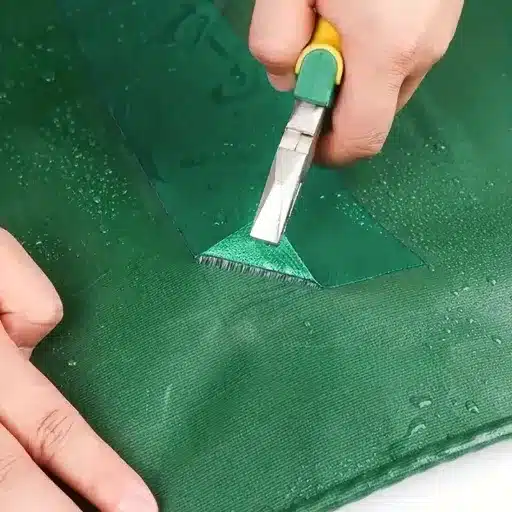
How to Patch a Tarpaulin Leak
If you want to repair the tarpaulin leak more lasting, do the following:
- 1
Clean and Dry the Area – As a first step, cleanse the area around the leak with a clean cloth and mild soap, dirt and debris are to be removed. Then, dry the area thoroughly so that good adhesion is not a problem. - 2
Use a Tarp Repair Patch Kit – There are various tarp-related repair kits on the market that contain waterproof adhesive patches. To get a good fit, measure the damaged area and make a patch that has a perimeter of at least two inches extra on each side. - 3
Apply the Patch – The next step is to place the patch on the faulty area and then press it down with your palm. As you do this, slowly move your hand outward to smooth out the patch, and make sure it sticks completely. A stronger bond is formed when some kits apply heat or pressure to the adhesive. - 4
Seal the Edges – For added security, apply waterproof sealant over the edges of the patch. It will be hard for water to get under the patch and spoil the repair. - 5
Test the Repair – Once the patching process is complete and your tarp is no longer leaking, test it by pouring water over the patched area. If necessary, reapply sealant or readjust the patch.
This method not only provides an effective seal for leaks but also invigorates the tarpaulin’s lifespan enabling it for use in the most demanding conditions.
Effective Use of Self-Fusing Silicone Tape
Self-fusing silicone tape is a dependable product for covering leaks in tarpaulin. To reap its full benefits, perform the following steps:
1. Clean the Damaged Area
Make sure that the part of the tarp that got damaged is clean and dry. Tape will stick well if you remove all the dirt, debris, and moisture.
2. Prepare the Tape
Take a piece of silicone tape for self-fusion that is long enough to cover the leak, allowing for extra length to overlap completely.
3. Apply the Tape
As you wrap the tape around the damaged spot, slightly stretch it while ensuring it is firmly wrapped. Each layer should be overlapped by about half of the tape’s width, which will result in a strong, waterproof seal.
4. Secure the Edges
After that, just press the tape edges down very firmly so that they become one with the surface under them.
This technique not only creates a long-lasting waterproof seal but also allows the tarpaulin to be reused in various ways.
When to Replace Your Tarpaulin

It is necessary to substitute your tarpaulin when it begins to exhibit extreme wear and tear such as big rips, tattered edges or cracked material that cannot be mended appropriately. Moreover, if the tarpaulin becomes unable to repel water or the sun rays, it may not be sufficient for covering and consequently, should be replaced.
Identifying Irreparable Damage
The most serious damage your tarp can suffer includes large unpatchable holes or tears, severe fraying that results in a loss of structural integrity, and the material becoming brittle and prone to cracking easily. If the waterproof coating is completely gone or if there are large areas of mold or mildew that can’t be cleaned, then the tarp should be replaced. Such problems severely limit the capability of the tarp and may even make it unfit for its intended use.
Choosing the Right Replacement Tarpaulin
When selecting a substitute tarpaulin, it is necessary to consider several vital aspects to ensure it will be suitable for your specific needs. The first thing that needs to be done is to find out tarpaulin’s intended purpose. Will it be for heavy-duty construction work, outdoor equipment protection, or vehicle cover? Then, pick the right material, for example, polyethylene for lightweight waterproofness, PVC for firm and sturdy, or canvas for breathing and reusable options. The size of the tarpaulin is another essential factor to consider. You should measure the area you are going to cover and then choose a tarp large enough to provide the needed coverage. Moreover, you should also consider features like UV resistance, waterproofing, and whether reinforced edges or grommets are necessary for safe fastening. If you think these factors, you will be able to make a wise choice and get a tarpaulin that is just right for your needs.
Steps to Safely Replace a Tarpaulin
Advanced Repair Solutions for Tarpaulin Leaks
Patch Kits
Specialized tarpaulin patch kits which consist of adhesive materials and pre-cut patches should be preferred. For peak adhesion, the area where the patch will be placed must be clean and dry.
Heat Sealing
A heat gun or a welding machine may be used to attach patches directly to the fabric. An impermeable seal that can go through heavy conditions, hence repairs are created by this method.
Waterproof Tape
Use top-quality waterproof tape that is approved for outdoor applications. Tape will be reinforced with layers applied one over the other to cover the leak completely.
Grommet Replacement
Replace grommets with torn edges using a grommet kit to prevent further tearing and water intrusion.
Vinyl Cement or Adhesive
Vinyl cement or heavy-duty adhesive should be used to seal leak-prone seams or holes efficiently. Make sure that a sufficiently long curing time is allowed for a strong repair.
These solutions, each catering to different levels of damage, efficiently extend the tarpaulin’s lifespan.
Using Epoxy Putty for Permanent Repairs
Epoxy putty is the perfect solution to seal up your tarpaulin materials effectively and permanently. When using epoxy putty, the very first step is to clean the area of concern thoroughly, making sure that no dirt, grease, or debris remains on it. After cleaning, cut or pinched off the amount of putty you require and start kneading it with your palm until the color is entirely consistent, a signal that it is well-mixed. After that, firmly press the putty in the hole or area of damage and then smoothen the edges so they blend with the surrounding surface. Let the epoxy cure according to the manufacturer’s guidelines, which usually takes several minutes to a few hours, thus producing a strong, watertight seal. This technique provides a strong and lasting repair even on the most damaged tarps, protecting them from further damage.
Leveraging Clamps for Reinforcement
Clamps are among the most valuable tools for supporting tarp repairs, especially in sealing cuts and applying patches. To make the most out of clamps, first put the tarp on a level ground and then overlap the damaged edges or the patch with the tear. After that, if required, apply glue or tape and then clamp the area so that the glue is securely held in place while it cures. Make sure the clamps are spaced out and are applying hard pressure, but do not overtighten them as they might cause damage. The clamp that has been set will provide a strong bond that lasts longer.
Joining Techniques for Seamless Repair
In the process of repairing tarpaulin leaks, it is essential to get a bond that is practically invisible and strong at the same time since this will help the tarpaulin leak repair last and work better. Heat welding is one way to do this, with the heat controlled so that only the edges of the tarpaulin are fused. The method gains a watertight seal and is very durable for future use. On the other hand, specialized adhesive tapes or sealants are alternatives that work just as quickly and efficiently and are particularly designed for tarpaulin materials. Their effectiveness is even greater if the surface of the tarp is clean and dry before applying these solutions. The combination of proper tools, techniques, and patience is the secret to restoring the tarp to its original state without compromising strength or appearance.
Preventing Future Tarpaulin Leaks

To prevent leaks, the tarpaulin should be regularly inspected for wear and tear, and weak spots should be mended promptly. It is advisable to use a perfect quality tarpaulin which is compatible with the environment and conditions it is likely to face and to make sure it is properly fastened so that wind or too much tension does not cause any stress on it. Keeping the tarp in a clean, dry place when it is not in use can also extend its life and maintain its integrity.
Regular Maintenance Tips
- ✓
Periodically check the tarpaulin for any signs of damage like tears, holes, or frayed edges. - ✓
Use mild soap and water to clean the tarp regularly and get rid off dirt, debris, and contaminants. - ✓
Make sure the tarp is tight and secured to avoid excessive movement and wear from wind. - ✓
When necessary, apply a waterproofing solution or UV protectant to increase its durability against the weather. - ✓
Keep the tarpaulin in a cool, dry place when not in use, and make sure it is folded or rolled neatly to avoid forming creases and stress points.
How to Secure Tarpaulins Against Weather Damage
To protect tarpaulins from the weather most effectively, it is necessary to use the best materials, properly install them, and maintain them regularly. First of all, the heavy-duty tarps made of polyethylene or PVC should be chosen, as these materials have excellent resistance to rain and UV rays. When putting the tarp on, use bungee cords, ropes, or ratchet straps to secure it tightly and attach it to strong structures. Make sure the tarp is evenly stretched, so there are no sagging areas where water or debris could collect. It is essential to regularly check for tears, weak points, or damage and repair them with tarp tape or patches to prevent further deterioration. Moreover, a slanted or peaked arrangement allows water to flow off instead of pooling which reduces the stress on the material. It is through these steps that the tarp is made to last and also be effective even in the face of unpredictable weather changes.
Best Practices for Storing Tarpaulins
Storing tarpaulins properly is vital for their longevity and performance. First of all, ensure the tarpaulin is completely clean and dry before placing it, as dampness can cause mold, mildew, and deterioration of the material. Neatly and compactly fold the tarp, avoiding sharp creases that could stress the fabric. The folded tarp should be kept in a cool, dry place that is not exposed to sunlight, as prolonged exposure to UV rays can weaken the material over time. If feasible, use a storage bag made for tarps, as it will help you organize and protect the tarp from dust and bugs. Make it a point to regularly check the tarps in storage and move them around if needed to prevent permanent folds or damage. By following these storage tips, your tarpaulin will remain in superb condition, ensuring it is ready for subsequent use.
Reference Sources
- How to Repair Ripped, Torn, or Damaged Tarps – A guide on using adhesive tape for permanent repairs to extend tarp longevity.
- How To Repair A Tarp: A Step-By-Step Guide – Detailed steps for repairing tarps, including patching holes and sewing seams.
- Repair of PE and PVC Tent Tarpaulins – Instructions for repairing PE and PVC tarpaulins using repair kits and replacing torn eyelets.
- Tarp leaks in heavy rain – any advice on how to fix these – Community advice on fixing tarp leaks, including using liquid seam sealing compounds.
- Tarp Repair Kit – PVC Fabric Vinyl Tarp Tape, Cement and More – A comprehensive repair kit for tarps, including tools and materials for effective repairs.
Frequently Asked Questions (FAQs)
Protect Your Investment Today
With proper maintenance, timely repairs, and the right techniques, your tarpaulin can provide reliable protection for years to come. Don’t wait until minor damage becomes a major problem – take action now to extend the life of your tarp and safeguard what matters most.


